Day 1 of the installation and the floor is in but not secured, the new water tank and plumbing was done and the water pump & filter moved.
 |
Day 3 and the job is almost done, just the other part of the slide bolt
needs to be found and fixed (its reused). |
I thought for a moment I had specified the tank to be a little too long or too high but with a great deal of fiddling and even more swearing it went in. The floor is screwed down all round and the softwood sections forward and inboard are fixed sideways so the whole lot should stay in place in the event of an inversion.
The lashing points are for fuel in cans, probably a max of 40 Litres in 10 Litre cans as my 20 Litre jerry cans are too tall, leaving no room for buckets to go in on top. That is somewhat less than previously but the tank effectively holds 10 - 15 Litres more than the old one which partially compensates and in total will still give 70 hours endurance, in reasonable weather that would be at 5.5 - 6 knots and 385 - 420 NM range (or quite a bit more with a clean hull and / or in dead calm waters).
I fitted a new fuel filter with a clear lower section and drain in case of water contamination. The original filter is in the engine compartment and would be almost impossible to get at when at sea unless it was dead calm, not good if you got the fuel bug. The fuel bulb made bleeding the system dead easy. The engine started immediately although I want to run it for another 30 minutes before leaving the mooring, just in case.
The big electrical cable is from the fuel sender to a NMEA converter so fuel level can be displayed on the plotter and one of the wind instruments.
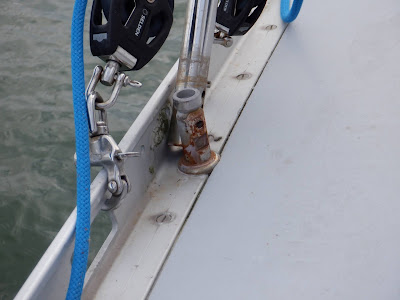
The rope hanging down (see also the 2nd pic) is my method of securing the locker from thieves and backing up the latch in heavy weather, the end of the tackle goes to a cleat inside of the boat, a similar system runs to the Lazarette hatch covers.
On my last sail I finally found one of the leaks into the compartment which appeared to be from the bilge pump, but when I got it out I found that when the new mainsheet track was fitted (before I got the boat) someone had drilled through the bilge pump outlet pipe so on the odd occasion I used it bilge water sprayed out, but unless the hatch was open which would be rare because you would normally sit on the hatch when pumping, you wouldn't know. Fortunately there was enough slack so I cut off 6" and refitted.
Update 6th November.
Unfortunately it didn't work. Last week I decided to do a long running test (rather than the 10 minutes or so after installation) and the engine stopped after 10 - 25 minutes on several tests. It appeared that the bulb primer was the problem.
Ron (a fellow Achilles owner and serial restorer) consulted with Roger (Dehler 41, "Blue Magic") who immediately recognised the problem which happens on some trucks, the solution should be to have the bulb vertical with the flow downwards so that gravity would help open the non return valve. The bulbs pump fuel best the other way up but does pump in all positions.
Unfortunately that didn't work, the Yanmar 2GM20's low pressure pump is just not powerful enough to open the valve on that brand of bulb (Osculati), this creates a vacuum in the fuel system and the engine stops. The first fuel filter is now connected directly to the tank and on the first test of the engine ran for an hour before I got fed up with diesel fumes blowing into the boat.
So a device to save a few minutes once a year when the engine is serviced or if it runs out of fuel, cost me a day and a half and a 160 mile round trip to the boat 😞.
Update Early December:
Even the above did not work properly, after a week of non-use the engine failed after 10 minutes but then ran for an hour after bleeding. This was getting serious and needed to be fixed quickly as I had to motor a couple of miles upriver to be lifted out on the 17th. I remove the old fuel filter, tap (there just might have been an air leak from the tap although it was not a joint that I undid and there was no fuel leak) and all extraneous pipe. It can't now get any simpler for a tank with a top take-off. It worked, I test ran for an hour a week later before moving to the RAFYC pontoon and again a couple of days later before going upriver and no problems. But I think I'll run another 15 -20 minute test as soon as the boat goes back in the water, which in any case is recommended procedure after a winter lay up.
Update March:
The new pipe work etc. retained fuel for 3 months of non use and after a 20 minute test I motored down river with no problems.


